Saturday, January 30, 2016

Guided Notes versus Interactive Notebooks

I absolutely LOVE using interactive notebooks in various capacities with just about every subject/content area I've tried. But there's always that one student who just can't keep up. Is there some written code that says all students' notebooks have to look the same? I thought so, but I had to figure something else out to benefit these lower functioning students.
interactive notebooks don't work for everyone

This past few weeks I've been experimenting with guided notes, rather than flippable notes. The idea is still the same, get the students interacting with their lessons. However, there's a lot less to keep track of, and my precious students aren't getting lost in the assembly process.

Take a look at a couple of examples from this recent fraction lesson. We are developing number sense with fractions, learning the different parts of and types of fractions and how they work together.


The key for me is the notebook itself. These guided notes require a three-ringed binder rather than a typical spiral notebook. I'm sure I could adjust the size of printing to reduce the pages to a size that could be glued to a spiral notebook page. I'm just not fond of the way that looks, and it reduces the amount of blank space the student has for writing his notes.

fractions guided notes

Another thing that I learned (the hard way) is that this method works best if the guided notes are punched to lay on the left side of the notebook, so practice pages can be inserted to lay on the right side. This way, the student has his notes right there and ready, and he doesn't have to struggle to write around the binder rings.

Since this has worked out so well with my current students, I'm going to be revising my previous interactive notebooks to offer a guided notebook version. If you think you'd like to use these with your students, I currently have the fractions packet above in my store. I'll be adding Skip counting and division soon. If you leave a comment with the content areas you'd love to have, when I make it, I'll send you a complimentary copy!

Saturday, January 23, 2016

Multiplication Strategies Part 2

I decided to continue the multiplication strategies post in separate posts so I can make each one it's own thought. I'll compile a master a list. If you haven't already read Part 1 on using the distributive property, you can read it here.

A quick reminder: I do NOT advocate rote memorization, what you will find here is not "tricks" to memorize facts. Rather, I believe in helping make learning abstract concepts relate to real world experiences. You will find here, tips and ideas that will help make learning come alive and retrievable.

2. Make Something. 

You read that right, make something, anything. This is a great tip if your student is a natural kinesthetic learner, if he is a creative type, and/or if she has body and spatial smarts. No matter which theory you use, making something will grab hold of more than one area of the students mind. He will be using his logic capacities as he solves problems, creativity as he designs his masterpiece, and if you set the environment up for it, he will also engage his emotional mind as he feels good about his work. Activating all of these neurologic centers immediately creates more mental connections from the abstract to the concrete.

But Miss Stefany, I'm not a creator, what can we make to help learn our math facts? Math is not art class!

I hear you, but I'm going to ignore that comment about math and art, they are very much related! ;)

Here are a couple of ideas to get you started creating with your math students.

Arrays are one of the first models students learn to connect with multiplication. So these first couple activities focus on the array model.

  • Punch holes in scrap paper with a hole punch. I cannot take credit for this idea, I recently found it on Pinterest, posted by The Primary Theme Park. I took this idea and ran with it with one of my autistic students this week. I have to say, this little guy does not have the fine motor skills to make his rows and columns look all neat and pretty, BUT, it made sense to him, it was easy for him to count and see the relation betweeen 8 x 3 and 3 x 8, and he laughed and had fun while he worked away.

  • Make Playdough models. I've done this for years, and a few years ago I had a little boy who wanted to take pictures of everything. He said pictures stay in his mind longer (he didn't have a real camera). I made this little paper cutout of a camera, and he held it up to his face and "snapped" a picture of the arrays or other figures we created. It was very important that he said "Click" when he snapped his mental picture. I'm still not sure if this was scientifically necessary, so you might want to encourage your students to follow through all the way as well ;) 
After either of these activities, I like to have students write out the facts they are working on onto a take home card. This is a large index card that goes home with them each week with their facts at the top and the arrays under them. The cards never come back to class, and I can only hope that my students share these cards with their family and continue to think about them throughout the week.
Another familiar multiplication model is equal groups. Students have been learning the basic of skip counting since first grade. These next few activities use the skip counting equal groups model.
  • Make a mini-book of facts. You might be familiar with lapbooks or interactive notebooks, homeschoolers and teachers love these because they work! My first use of these mini-books for math was a free resource available on Homeschoolshare. It's simple, easy to assemble, and versatile for many different learners. Being the creative type that I am, I eventually had to make a themed one for myself uh-hem, for my students ;). It's got a race car theme and was super fun for my second and third grade boys. The mini-books are great because kids actually want to revisit them, they'll play with them, and show them off to parents and siblings. When they are that excited about something, the energy has to be transferred to the skill they are developing, in this case, multiplication facts!
                               
  • Make your own flashcards. They don't have to be fancy, or printed out using flashy graphics. Just write a fact at the top of an index card, have your student draw a picture of equal groups to show the skip counting, then write the answer on the back of the card. Yes, using flashcards to learn the facts is a form of rote memorization, however, the act of drawing out the picture provides a visual cue to a memory of the fact already stored, thus focusing on retrieval rather than repeated filing. 
This last set of activities has to do with bringing multiplication into the real world. Sometimes, all students need is a good reason to learn the facts. 
  • Build a model of dream house. Start with drawing out the plans on grid or graph paper.  This can lead to discussions about painting the walls (you'll need to figure out area for that!) and laying carpet (More area), and perhaps building a posch (Yup, you guessed it, more area). Then if your student is up for it, you can move into purchasing supplies and building the scale model, they will feel accomplished and have something to show for all of that hard work!

  • Feed an army. Not literally of course, unless you have one to feed. Take a trip to the grocery store, either in real life or through the pages of the weekly advertisements or online options. Shop for x number of guests, buy supplies to make x servings of each dish. While you're at, make it even more real life and calculate the cost of this meal! Maybe your little mathematician will get a philanthropic bone and be moved to give of his time at a local soup kitchen!

There is no magic fix for learning multiplication facts, but if you apply a few of these strategies your students will surely be on the road to mastery!


Tuesday, January 19, 2016

Adding and Subtracting Integers

My seventh graders ALWAYS struggle with the concept of adding and subtracting integers. There are only so many "real life" ways to express positive and negative numbers, and I know I've tried them all. Sometimes they help, other times the don't, and worst of all, sometimes they seem to help when they really don't at all.

This year, I have one student that was simply not getting it, no matter what. And she was stressed out about it (typically a math minded little girl). We spent several days, drawing pictures of thermometers and talking about the temperature (helps we live in Michigan, so she was very used to temperatures dropping below zero). We drew pictures of mountains next to the sea (I even have a card game that uses this image, it's helped so many, but not her!).


I was at my wit's end when I decided to spend some alone time with my white-board and poster paper. I drew number line after number line, labeling and relabeling, organizing and reorganizing sets of facts. Until it appeared. Please tell me this is new to you, because in all of my years of teaching math and learning it through school, this pattern was NEVER pointed out to me, and I NEVER recognized it before.
In Kindergarten through third grade, we teach fact families, er, number bonds. Why don't we use that concept in seventh grade with integer equations? When my little student saw this connection, she immediately understood what going on, and flew through homework, took her test and rocked it, and is now ready to deal with positive and negative decimals. (Let's hope that goes a little more smoothly!)


The numbers in this fact family, er, number bond, are 2, 3, and 5, we must remember we are working with integers, so we also will be using the opposites of 2, 3, and 5 (-2, -3, and -5). We start with the number bond we are familiar with, 2+3=5, this is easy, we know how it works, we can apply the commutative property of addition to this equation, and just switch the place of the addends: thus 3+2=5. I wrote the out in different colors and marked them on the numberline in coordinating colors.

Now, we think about the rules we know about adding and subtracting integers. If we start with the 3, what can we add or subtract from 3 and end up at 5? My little smarty pants said, "subtracting a negative is the same as adding!" Fantastic! So 3-(-2) is virtually the same as 3+2, both result in 5 and both move on the numberline exactly the same. So we wrote that in another color and marked it on the numberline. You can see the blue and red following the same movement.

The next step was to apply the commutative property (in a sense) to this expression and see if it resulted in the same movements as out other number. That would be 2 -(-3), and sure enough, it does, It followed the same exact pattern as 2-3! ALL of these expressions are equal 5, AND work like addition on the numberline (moving spaces to the right of the starting number).

Next we moved on to adding negatives. My little student understood the concept of adding negatives and gaining negative distance from 0. She knew that to find the sum you add the absolute value and take its opposite. Easy as cake! Now what if you apply the commutative property of addition? YES! She found that -3+-2=-5 and -2+-3=-5.

Just like we did before, we stopped and asked ourselves, Is there any other way to start at -3 and end up at -5? YES! She immediately said, if you KCC! Gah! I can take a moment to express my loathing of this term? So she meant to keep the state of the first term, change the operation and the state of the second term. So, -3+-2 becomes -3-2. And yes, unfortunately, it works! I explained that is because adding a negative works the same as subtracting a positive, looks at our matching movements on the numberline ;)

Finally, we apply the commutative property (sort of) to -3-2 and we see that -2-3 ends at -5! My smarty pants students says, "Bah, BAM!"

Let me just take a moment and clarify that "sort of" application of the commutative property. We are really just expressing the same concept with different operations. We know that 3+2=5 and 2+3=5, that IS the result of applying the commutative property. However, when we are dealing with negative numbers, it doesn't always look so pretty. -2-3 is subtraction, and the property is only applicable to addition (and multiplication). However, when subtracting on the left side of zero, the numbers work together during subtraction as they normally do during addition on the right side.


We are to the related fact family, er, number bond, are 2, 3, and 1, we must remember we are working with integers, so we also will be using the opposites of 2, 3, and 1 (-2, -3, and -1). This time we'll be focusing on subtraction. We started with the more difficult to visualize bond, so let's just pretend we started with the bond we are more familiar with, 3-2=1. We remember from our last exercise that subtraction is the same as adding a negative, so 3+(-2) should work the same as 3-2. Notice our color-coded movements on the numberline (green & blue on the top). Sure enough, it works!

Now let's apply the commutative property of addition to the last expression, 3+(-2) should equal (-2)+3, and it does! And our related expression, using our knowledge that subtracting a negative is the same as adding a positive (KCC, or Chum Chum). -2-(-3) is in fact 1!

But, what about that expression my dear student and I started with? 2-3. For those of us who have been working with these numbers for years, it's easy to see the result is -1, but what about our students who have been told for years you can't subtract a number from a value that is smaller? The number line really helps in this situation, As the student hops back 3 spaces from 2, they can clearly see the difference is -1. We also know that subtraction is the same as adding a negative, so we can re-write that equation to 2+(-3).

Applying the commutative property to that expression results in -3+2. We can reason without the number line that if I lost 3 pencils, and then found 2, I'm still missing 1, so yes, this expression equals -1. And then to find it's related expression, we must think, how else can get back to -1 when starting at -3? This is our KCC or chum chum "trick" (gah, I hate tricks!). -3+2 is the same as -3-(-2).

The actually math logic behind this trick is really much simpler than the trick itself. It's all about following the road signs. On our chart we wrote the negative (subtraction) sign with the arrow pointing left and the positive (addition) sign with the arrow pointing right. That is essentially the way the operation force numbers to move on the number line, regardless of the numbers value or sign. When the number that follows the operation is negative, it tells you to turn around (do a U-turn) and move the opposite direction. My son calls this illegal U-turns ;)

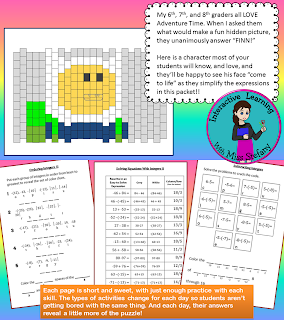
I hope some of these math meanderings will help you to help your students make sense of adding and subtracting integers. A while back I created a fun packet to help my 7th graders rewrite expressions into something easier to work with. In the end they create a colored page of a character most of them love.


Friday, January 8, 2016

Pre-Pre-Algebra...Is there such a thing?

No, that is not a typo, I meant to say pre-pre-algebra. They don't call it that, but what else do you call whatever is going on in 6th grades across America these days? My two youngest were in 6th grade last year, and their text book was called "Algebra and Geometry Fundamentals." Most of their "Core Focus" questions came straight from a high school Algebra textbook, yet they were told to solve using picture models, guess-and-test method, and things called number tiles. They haven't been properly educated on the Algebra rules and algorithms, so my hands were tied in using them.

Here is an example that was recently brought to my attention by another tutor. Her 6th grade student was given this question:

How do you go about teaching this young student to solve this problem without using a system of equations? 

First, we have to figure out what the information is telling us. I like to use tables, it leads nicely into functions later on, and organizes all of the information so nicely!

I can see right away that I could use comparison bars to represent two different subtraction equations. I see the amount of apples I started with, minus the amount I sold, equals the amount I have now; or x-82=a And I see the amount of pears I started with, minus the amount I sold, equals the amount I have now; or x-34=p. 

But these equations are missing too much information to solve. So I need to try to figure out some of the other missing details. I used "x" for the start of both equations because the story told me that there were the same number of apples and pears to begin with. I can use that to look at the comparison given. The story said that I now have 4 times as many pears as apples. That means, for every 1 apple, I have 4 pears. 

If I were doing a legit algebra problem I could use that information and replace the "p" in my second equation with 4x. BUT, we are only 6th graders and don't understand how to use a system of equations. So we have to think like scientists for a minute. 

There are 3 facts about this problem that will help us solve it. 
  1. BOTH fruits started with an equal quantity. 
  2. Different amounts have been sold.
  3. The ratio of the remaining fruits is 1:4
For my low students, I would suggest the guess-and-test method to solve this. I despise that term and if there is ANYway possible you can avoid using and burning it into your young students minds, I really think that would be great. But it is a method that is taught. I'll just simply ask my students, "what numbers do you think will make this work?" It's kind of like looking at a broken bicycle and asking a child what will make that bike go again? Most students will likely pull a random number from thin air, with no rhyme or reason. Take it and work with it. I find that if you focus in on how to hypothesize at this point, you lose the math point.

 
To help my more advanced students get this process started, I might focus in on the ratio of the remaining parts, and the difference in the amounts sold. These numbers give clues so the "guess" part of the problem solving can have a little more rhythm. It also can save A LOT of time on tests! Looking at the number tiles below, you can see an overlap. The difference in the remaining amounts is 3 parts (not to be confused with 3 pieces of fruit!), The difference between the amounts sold is 82-34=48. If we divide those 48 pieces of fruit into 3 parts, each one will be 16 pieces of fruit. We can use that 16 to solve now, without using that table and 5 or six "guesses" that may or may not end up leading us to the right answer. 


If this has got you all feeling, "why do we even have to teach this way?" Trust me, I understand! Here's what I have been telling myself:
  1. These kids still need practice with their basic facts, none have them memorized, and NONE want to memorize them because they don't see the need. This tricks them into  using those skills for a purpose! They get real life (sort of) practice using the basic facts and rules of math to solve problems.
  2. They are also getting practice working with numbers in a complex situation they might never encounter naturally before Algebra begins for real. This should ease their fears and provide some background knowledge for those teachers to capitalize on later.
  3. Finally, they are problem solving, no matter what method is used, or how complex the steps are to get to the answer. Math is about finding a solution to a problem, based on what can be observed and what can be determined. This is a skill that transfers to every area of life. 
Until next time!

Wednesday, January 6, 2016

Have you heard of WEO?

I'm always looking for ways to encourage my students to keep working on their skills between our lessons. I don't believe in the old memorization routines, however, I am a firm believer in practice makes improvement! Trying to find a way to keep connected with my students outside of class, and yet accountable was a challenge! A few months ago I stumbled onto a fairly new site (through my Facebook feed) called WEO.

It looks and feels a little bit like Pinterest, in fact the company boasts that it is a Pinterest for teachers. I kind of laughed at that because we already all use Pinterest don't we? After a little digging I figured out what they meant. It isn't an idea/product pinning system, it's a lesson/assessment pinning system. Pretty cool right?

When I create a lesson for my students, the system automatically tracks their progress, tells me when they've worked on it, and even auto grades their responses if I set up the answers for it. It's saving me a ton of paper! Instead of giving worksheets or handouts for my students to practice over breaks and weekends, I now tell them to log onto WEO and see what's new!

It's free and easy to set up an account, I just signed up using my Google id. It's also super easy for students to sign up and join a class. I have 2 running right now, a GED prep and an Algebra basics. As a teacher I am given a code for each class that I can give to my students, and then they enter the code to join the class (a bit like Edmodo works).

I recently had the opportunity to ask Josh, one of the administrators of the site, a few questions I thought other teachers/tutors might have about using the site.

1. Can students access the assignments on any internet device? If not, what are the specific restrictions?
Students can use Weo on any device with an updated browser, although it works best with chrome and we wouldn't recommend using it on a phone
2. Is WEO a viable source for online tutoring partnerships? Meaning, can I assign lessons to an online student I work with in a different country?

Weo is definitely a viable tool for tutoring remotely. In fact, we have companies that use Weo for remote training. As long as your students have an internet connected computer and an updated browser they are good to go.

3. If I find a great assignment from another teacher and want to assign it to my class, will it still auto grade or will I have to edit it? Can I edit it?

All assignments in our system will auto grade regardless of whether it's yours or someone else's. If you want to make changes to someone else's assignment, you can pin it to one of your boards and then edit it. The edit option can be found in the top right corner once you've opened up the pinned activity.

4. Can I use the site as both a teacher and student? I am a math teacher, but might one day take French lessons, can I join a class as a student with my teacher account?
We will definitely be adding the ability to be both a teacher and a student sometime soon. However, right now you'd have to create a separate student account  to join someone's class.
Thank you for that brief interview Josh! 
Here's a link to my profile if you want to check it out. 
Oh, one more thing I want to share with you about this new platform, they are paying teachers for creating lessons right now. I was a bit leary of this at first, since I already have a store on Teachers Pay Teachers. But it's nice to get a little paypal bonus for something that is benefitting my students anyway! Here's the page that describes the curriculum development program. They explain how to get started, how to qualify for payments, and the pay scale for lessons. 
After you check it out, come back here and let me know what you think!

Most Popular Posts Lately